Resources:
- How to request IT help from DoIT- https://rtforms.umbc.edu/rt_authenticated/doit/DoIT-support.php
- Make sure to include, “Please forward this message to CAHSS IT” in the message.
- Computer requirements to purchase- https://cahss.umbc.edu/it/
- Cannot be a MacBook Air, must be a MacBook Pro.
- Do not buy a 24inch iMac, only a 21.5 or a 27inch.
- Free software for UMBC student, faculty, and staff – https://wiki.umbc.edu/display/faq/Software
- How to link your UMBC owned computer to the department printers (outlined below)
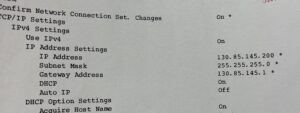
- The IPS address for the printers are printed and taped next to each printers.
For when your network printer has either been “forgotten” by your computer and it can’t be found or for anyone returning to campus after a long period of time.
***In order to be able to connect/use/see any networked printers for your department, you will have to be connected EDUROAM wifi or be plugged into the network directly via Ethernet Cable***
**If you are not connected to the network via Ethernet Cable, please connect to the Eduroam wifi: If you need help connecting please use <this article>**
*If you are on a MAC and trying to connect to Eduroam. When you click on it to connect. When it asks for your Username and Password: Please use your FULL UMBC EMAIL ADDRESS as your username and the same password you use to login to myUMBC to connect*
Once you are on the network. Please see the below steps for both PC/Windows and Mac.
To Add a Network Printer to your PC/Windows computer (this works for both Windows 7 and Windows 10):
1. Start > Settings > Devices > Add a printer or a scanner
2. Click “the printer I want isn’t listed”
3. Select “Add a printer using a TCP/IP address or hostname”
4. Click Next
5. Device type should be set to Autodetect
6. Type in the IP address of the printer (the below information is for the larger printer at the end of the hallway)

7. The Port name will be configured automatically when you type in the IP address
8. Click Next
9. The computer will search for the printer, download the correct drive, and have the printer name listed on the next screen
10. Click Next
11. Select “Do not share this printer”
12. Click Next
13. You may want to print a test page from your computer just to make sure that it is configured properly
14. Click Finish
To Add a Network Printer to your Mac:
1. Apple Menu > System Preferences > Printers and Scanners
2. Click the “+” at the bottom of the left-hand side menu
3. Click “Add Printer or scanner”
4. Select “IP” at the top
5. Type in the IP address in the “Address” bar
6. The computer will automatically search for this printer and download the necessary driver
7. Click Add